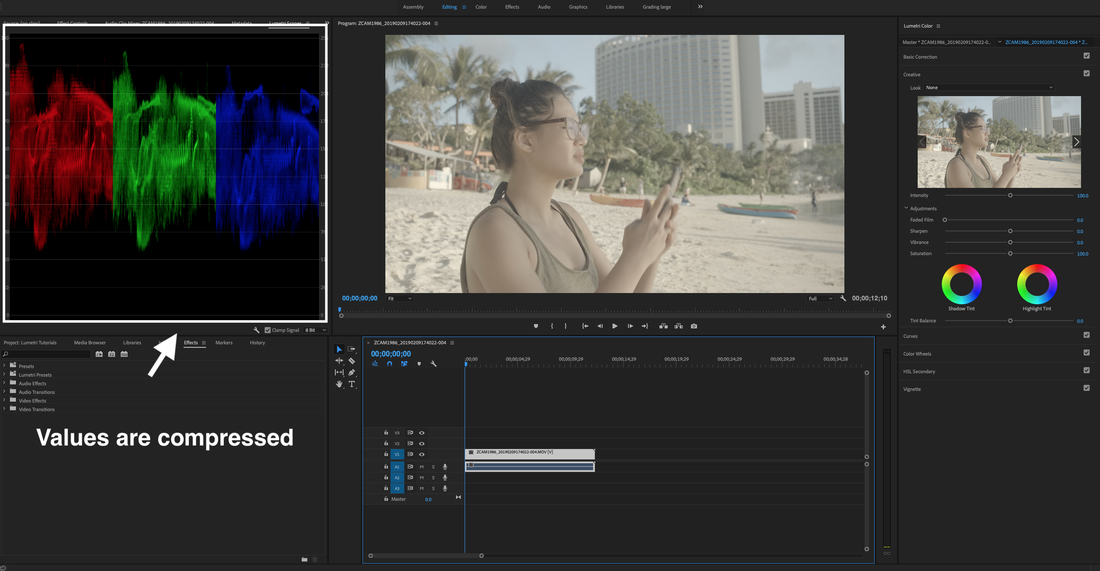
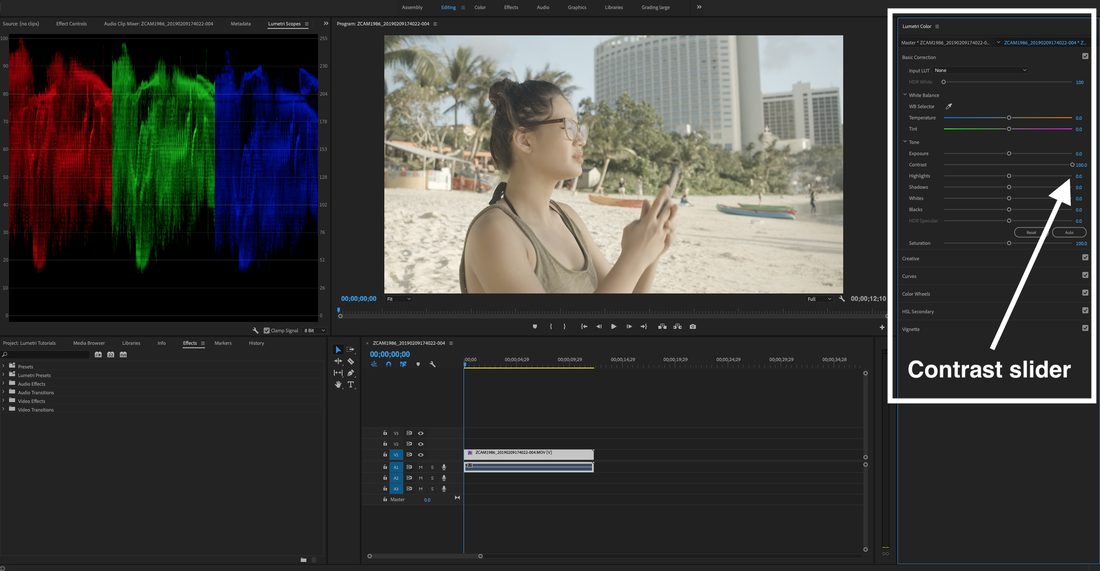
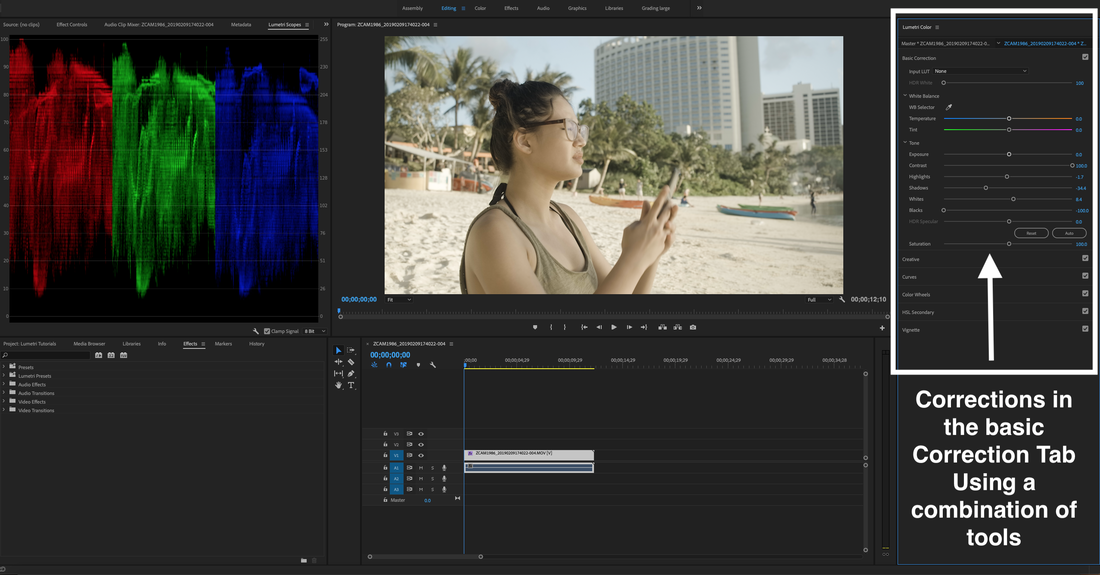
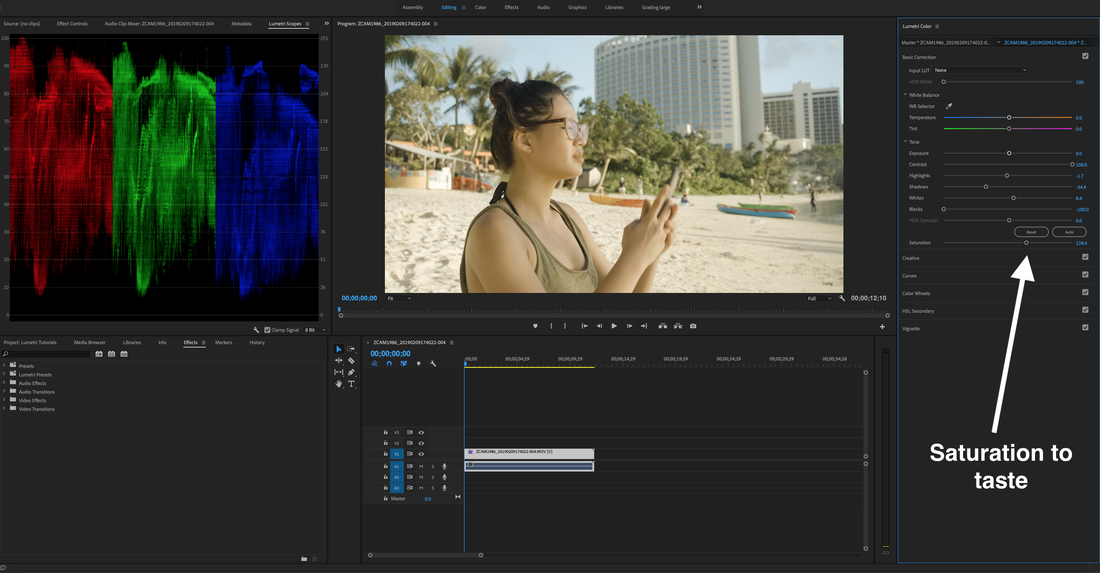
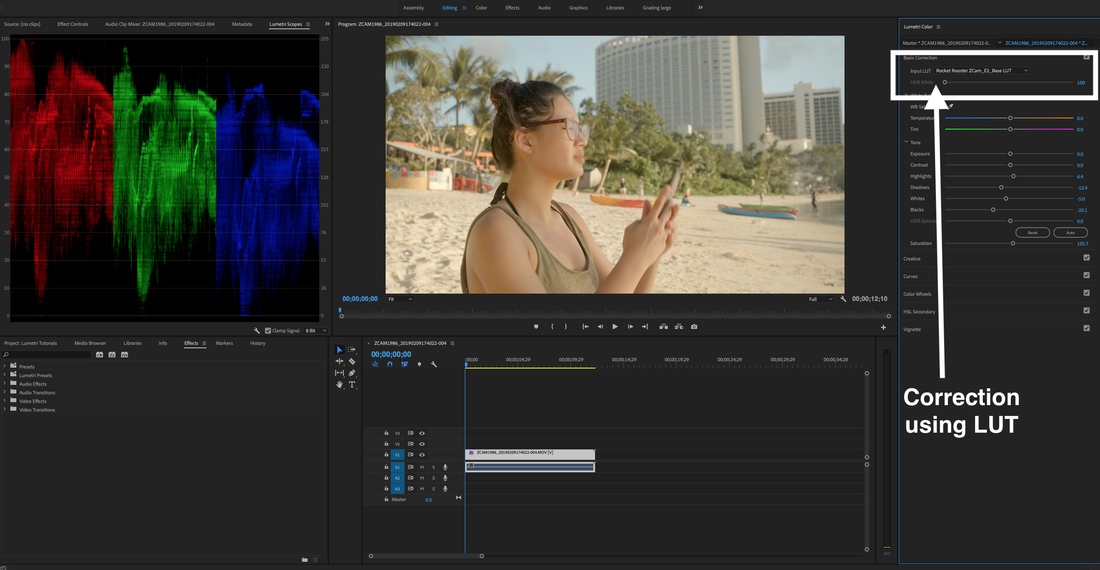
From the ArchiveWorking with Log footage is really easy in Lumetri, trust me, it really is! In this quick tutorial, I'm going to teach you how to quickly get your flat ugly log footage corrected with out the use of any LUTs and I'm also going to give you some reasons for when and why you might want to use a LUT to correct your footage. Log footage comes with many benefits, for one; it compresses as much information as possible to give you a wider dynamic range and a lot of times colour tonality giving you more room to play in post. On the flip side, this often means you would need more time in post-production, valuable time that you may not want to have to spend, but more on that later. Starting with our log image we can see that all the values have been compressed into the middle of our waveform which means we need to expand the image so that we can get more contrast into the shot. Pro Tip: You want to keep your primary corrections in the basic correction tab. As you can see from the image below, simply cranking up the contrast slider doesn't seem to have the desired effect. What we need to do is combine all the tools at our disposal to get the job done. In the image below, you can see that I've managed to get a better looking image by combining the contrast slider and the other available luminance tools (Highlights and Shadows, Whites and Blacks) to expand the waveform so that the image appears to have a more balanced look. From here you can add saturation to the image, remember a little goes a long way. Generally, you want to add saturation after you have balanced the luma values (The brightness and levels in relation to highlights and shadow. Pro Tip: Adding contrast increases saturation so if you add contrast you should see if you need to lower the saturation of your image. When should you use LUTs for your primary corrections. LUTs can be a useful tool and can greatly simplify this process. Having said that, you should not look at a LUT as drag and drop, paste it and forget it solution. You need to take control of your image, so understanding how to make primary corrections yourself will help you fix some problems that you may encounter even if you use a LUT. Using a LUT tailored for your camera can also have some other benefits. In the example below, the LUT applied to make this primary correction is the Rocket Rooster Z Cam Base LUT. This LUT is based on the Arri Alexa so it converts the native Z Cam E2 colour to something a little different. There are several conversion LUTs available on the Rocket Rooster store, all $5 or less. Pro Tip: You will notice I still used some of the controls in Lumetri to tweak the image despite using the LUT. You must take control of your image, use LUTs to get you 70% of the way you want to go and do the rest yourself.
1 Comment
|
Archives |
Rocket Rooster
|
BECOME AN AFFILIATE |

Check out Rocket Rooster
Products Here
Products Here
NOTE: ALL SALES ARE FINAL, NO REFUNDS. ROCKET ROOSTER PRODUCTS ARE ONLY AVAILABLE FOR DIGITAL DOWNLOAD

 RSS Feed